 By Charlotte
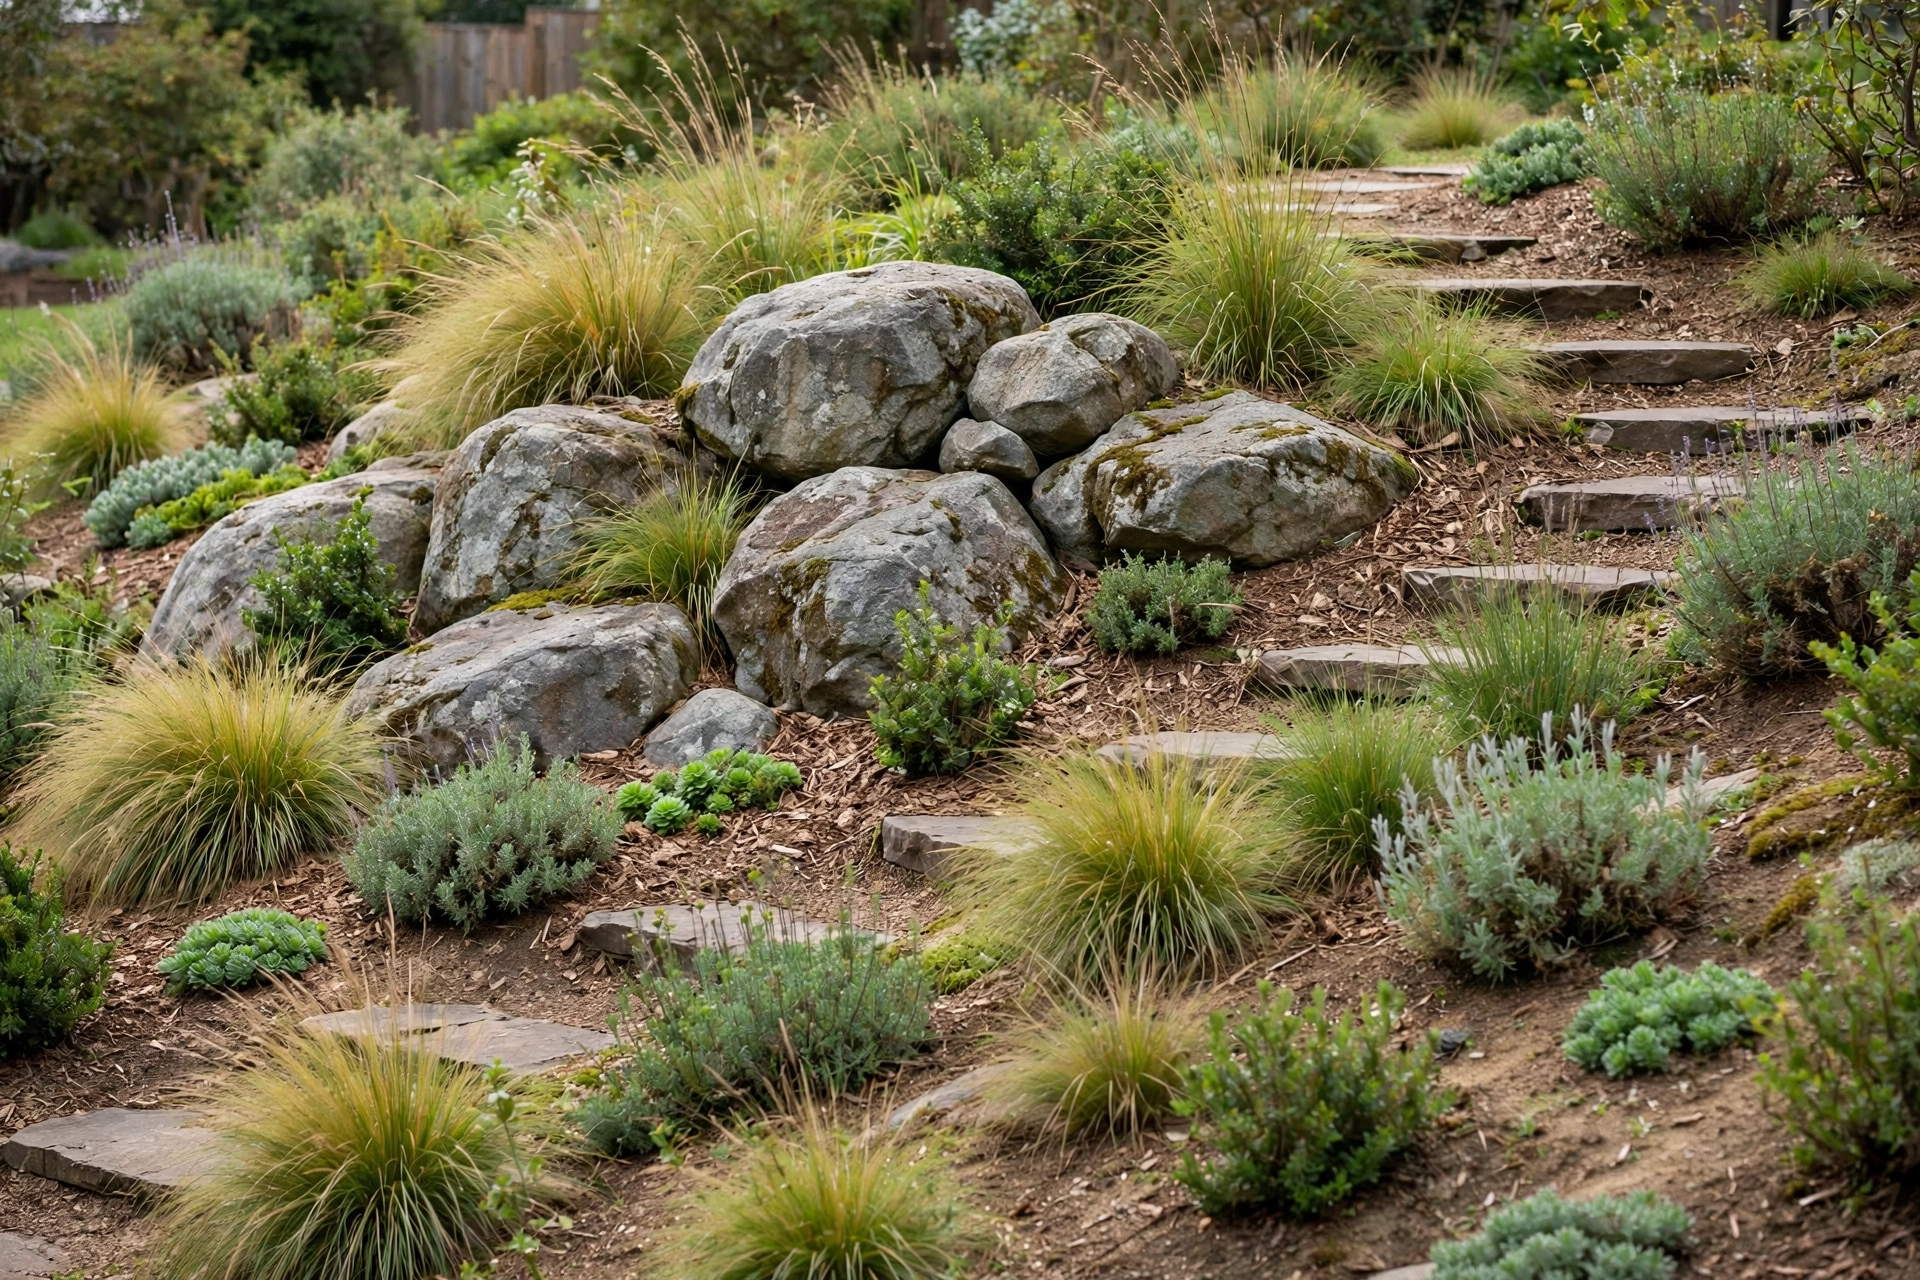
A few well-placed stones can do what a season of planting sometimes cannot: make a garden feel as though it grew there on its own. Boulder landscaping is the deliberate arrangement of large natural stones so they read as part of the landscape, not decoration dropped on top of it. Done well, it gives flat gardens structure, turns awkward slopes into features, and solves drainage problems while looking completely intentional.
The Short Answer
The most natural-looking boulder landscaping uses odd-numbered clusters of three to five mixed-size stones, each buried at least one-third below grade, rotated to show different faces, and spaced irregularly the way rocks appear in the wild. On slopes, stagger stones in loose V-shaped groupings with the widest side down on compacted gravel, and let water flow around them, never straight through a line of stone. Choose rock native to your region, soften every edge with groundcovers and ornamental grasses, and match stone scale to the space so the arrangement feels natural, not imposed.
Why Boulders Make a Garden Look Natural
Plants are seasonal; stone is permanent. That permanence is why boulders anchor a landscape. In nature, rock is the skeleton everything grows around: glacial erratics in a meadow, outcrops breaking through a hillside, river-worn stones marking an old creek bed. Echo those patterns and the eye accepts the arrangement instantly. Stone also fixes what makes gardens look unfinished: it breaks up runoff on slopes, marks grade changes, and creates planting pockets that would otherwise wash downhill.
Boulder Landscaping Design Principles That Mimic Nature
Every convincing boulder arrangement follows rules borrowed from observed landscapes. Learn these before you buy a single stone.
Group in Odd Numbers
Nature never places stones in pairs. Use three or five boulders with one clearly dominant stone and the rest stepping down in size, overlapping slightly so smaller stones tuck behind larger ones. Avoid mirroring placements on either side of a path unless you deliberately want a formal, man-made statement.
Bury at Least One-Third of the Stone
The classic beginner mistake is setting boulders on top of the soil like sculptures. Real outcrops emerge from the ground, so excavate a seat and sink roughly one-third of each stone below finished grade, closer to half for very large boulders. The buried portion locks the stone against shifting during freeze-thaw cycles and heavy rain.
Match Stone to Its Surroundings
Rock native to your region always looks most at home: granite in New England, sandstone in the Southwest, limestone in the Midwest. Local stone matches the soil, plants, and architecture the eye already expects. Imported stone can work if its color echoes the house trim or existing hardscape, but a mismatched rock draws attention to itself instead of blending in.
Choosing the Right Boulders for Your Garden
Decide each stone's job, focal point, slope anchor, bed edging, or step tread, before visiting the stone yard. Look at every candidate from several angles and check for interesting texture, veining, and color variation, because a plain, featureless stone reads as a lump rather than a landscape element.
Arrangement Ideas for Flat Residential Gardens
Flat yards are blank canvases, and boulders are the fastest way to add topography without hauling in fill dirt.
Clustered Outcrop Beds
Anchor one larger boulder toward the back of a planting bed, then nestle two or three smaller stones in front at different depths. Fill the gaps with low sedums and creeping groundcovers rather than mulch alone; live plants spilling against stone is what sells the illusion of age.
Dry Creek Bed
A dry creek bed manages drainage and looks deliberate even in dry weather. Dig a shallow, gently curving channel, line it with river rock, and dot the edges with irregularly placed boulders, never in a straight row. Angle the channel to carry runoff away from the house, and plant moisture-loving natives where water runs heaviest.
Pathway Framing
A narrow side path feels like a corridor until two staggered boulders break the tunnel effect. Place one stone on each side but offset them, keep them below knee height, and tuck thyme or dwarf mondo grass at each base to blur the line between path and bed.
Single Statement Boulder
One exceptional stone with dramatic veining, shape, or color earns a solo spot in a main sightline: from the kitchen window, at the end of a path, or near the entry. Surround it with fine-textured contrast plantings like ferns or ornamental grasses, and resist flanking it with matching stones.
Arrangement Ideas for Slopes and Uneven Terrain
On a slope, every stone should earn its place by holding soil, slowing water, or making the grade walkable. Always work from the bottom of the slope upward so lower stones support the ones above.
Staggered Slope Outcroppings
Set boulders in loose groups of three, a few feet apart in a staggered V pattern across the slope. This breaks up sheet runoff, traps soil and moisture behind each stone, and creates planting pockets. Dig an indentation for each boulder, set its widest face parallel to the slope, and pack soil firmly around the base. Straight rows let water channel between stones, so irregularity is functional, not just attractive.
Boulder Terracing
For slopes that are hard to mow or plant, cut the grade into two or three shallow terraces and line each riser with large boulders. The stone's weight holds the soil back without mortar; leave small gaps or fit short PVC pipes between stones so water weeps through instead of building pressure behind the wall. Fill each terrace with topsoil and deep-rooted natives whose roots knit the structure together.
Natural Boulder Steps
Where a slope needs foot traffic, flat-topped boulders make a charming staircase. Set each tread level with its back edge buried into the hill, flank the run with smaller boulders, and keep risers under about seven inches for comfortable climbing. Creeping thyme or sedum spilling over the edges softens the whole run.
Step-by-Step: Placing a Boulder Arrangement
Follow this sequence for any project, from a three-stone cluster to a full hillside outcrop. Drainage and base work come before any stone leaves the truck.
Mark the layout. Outline each footprint with spray paint or a garden hose, then view it from the street, patio, and windows.
Check underneath. Call your local utility locator before digging to rule out buried lines, septic components, or drainage pipes.
Prepare the seat. Excavate a shallow depression slightly larger than each footprint and fill it with four to six inches of compacted crushed gravel to distribute weight and prevent sinking.
Set the largest stone first. Lower it with the widest, flattest side down and the best face toward the main viewing point, burying roughly one-third of its height.
Add the supporting stones. Place smaller boulders at irregular depths and varied rotations so no two faces match.
Lock everything in place. Backfill with native soil, tamping firmly in layers, and confirm nothing rocks when pushed hard. On slopes, drive short rebar stakes just downhill of each boulder as hidden insurance.
Plant and finish. Tuck groundcovers and perennials into every gap, then water deeply. Live planting against the rock is the final step that makes the arrangement look established.
Plants That Soften Boulder Arrangements
Stone without planting looks like a quarry. Fine-textured foliage against rough rock, silvery leaves against dark basalt: contrast is what makes both elements shine. Lean on natives adapted to your soil and rainfall, and avoid thirsty plants right against stone, since boulders shed water and reflect heat.
How Much Does Boulder Landscaping Cost
Boulders are priced by the piece or by the ton, and delivery plus placement often costs as much as the stone itself. The figures below are estimates from contractor pricing guides; local rates and site access swing the final number.
7 Common Boulder Landscaping Mistakes
- Unburied boulders look temporary and shift over time; sink at least one-third below grade.Perching stones on the surface.
- Pairs and mirror placements read as man-made; odd, irregular groupings read as natural.Even numbers and symmetry.
- Identical stones at equal intervals look manufactured, not like an outcrop.Uniform size and spacing.
- Stones across a natural water path create dams; let water flow around the arrangement.Ignoring drainage.
- A six-foot boulder overwhelms a courtyard; tiny accents vanish in a large yard.Wrong scale for the space.
- Heavy stone on soft soil sinks and tilts within a season or two; use compacted gravel.Skipping the base.
- Bare stone in mulch looks unfinished; groundcovers complete the illusion.Forgetting the plants.
Safety and When to Call a Professional
A medium boulder weighs several hundred pounds and a large one can weigh more than a car, so respect the physics. Wear steel-toe boots, heavy gloves, and eye protection, keep children and pets clear, and never try to catch a rolling boulder with your body. Call a professional crew for anything above a few hundred pounds or requiring a skid steer, excavator, or crane. On slopes, never work below anyone moving stone, stop when the ground is slick, and have boulder retaining walls engineered when they hold back significant soil or sit above walkways and neighboring property.
Final Thoughts
Natural-looking boulder landscaping comes from restraint guided by observation: odd clusters, buried bases, irregular spacing, the way rocks sit in the wild. Your next step: walk your yard this weekend, mark two or three candidate spots with a garden hose, and photograph them from your main viewing points. Take those photos to a local stone yard and you will buy the right boulders the first time.
Frequently Asked Questions
How many boulders should I use in one arrangement?
Three to five boulders make the most natural cluster for a typical residential garden: one dominant stone about twice the size of the rest, with smaller stones tucked around it at different depths.
How deep should I bury a landscaping boulder?
Bury at least one-third of the boulder's height below finished grade, closer to one-half for stones over five feet across. The buried portion makes the stone read as a natural outcrop and locks it against shifting, sinking, or rolling during freeze-thaw cycles and heavy rain.
Can I move and place large boulders myself?
Boulders up to about 200 pounds can be moved by two strong adults with a hand truck or rock dolly. Anything heavier needs rented equipment like a skid-steer loader, or a professional crew with an excavator or crane.
What plants grow best around boulders?
Ornamental grasses, creeping thyme and sedum, ferns in shade, and drought-tolerant perennials like lavender and penstemon all thrive against stone. The lean, fast-draining soil around boulders suits alpines, succulents, and Mediterranean herbs better than thirsty plants such as hydrangeas.
How much does boulder landscaping cost?
As estimates, individual boulders run roughly $100 to $800 per stone by size, with exceptional pieces over $1,500; a typical installed three-boulder project costs about $1,050 to $3,600. Crane placement adds roughly $200 to $600, and major site preparation can add $1,000 to $6,000 or more.
Will boulders damage my foundation or drainage?
Boulders do not damage foundations on their own, but poor placement can redirect water toward your house. Keep large stones a few feet from foundation walls and make sure the arrangement lets runoff flow around the stones and away from the structure.
How do I keep boulders from shifting on a slope?
Seat each boulder in an excavated depression with its widest side down and parallel to the slope, bury at least one-third, and backfill with firmly tamped soil or crushed gravel. Stagger stones in a V pattern rather than straight rows, and on steeper ground drive short steel rebar stakes just downhill of each boulder as hidden anchors.