 By Charlotte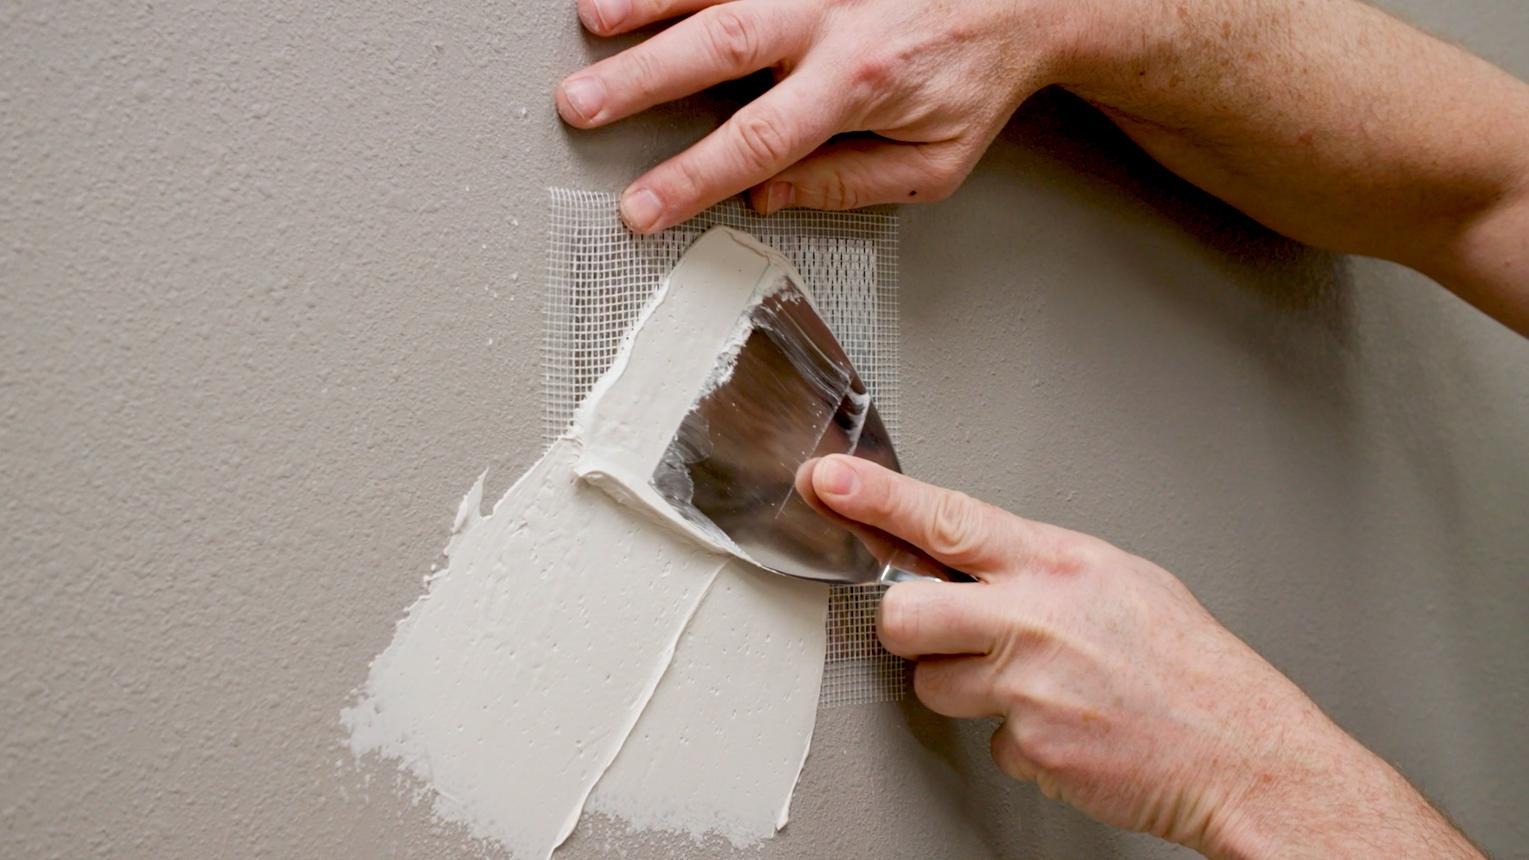
Damaged drywall can make an otherwise attractive room look neglected and unfinished. Small holes, surface cracks, dents, water stains, and damaged corners are common problems in residential interiors. Whether caused by moving furniture, everyday wear, plumbing repairs, or settling, these imperfections can affect the appearance and condition of interior walls.
Fortunately, not every drywall problem requires removing and replacing an entire wall. Many types of damage can be repaired using straightforward techniques, affordable materials, and careful finishing methods.
Understanding how to identify drywall damage, select appropriate repair products, and restore a smooth surface can help homeowners improve their interiors without unnecessary renovation expenses.
The first step in any drywall repair project is determining the type and extent of the damage.
Some imperfections affect only the painted surface, while others extend through the drywall panel or indicate problems behind the wall.
Before choosing a repair method, examine the affected area for cracks, loose material, moisture, and structural movement.
Common types of drywall damage
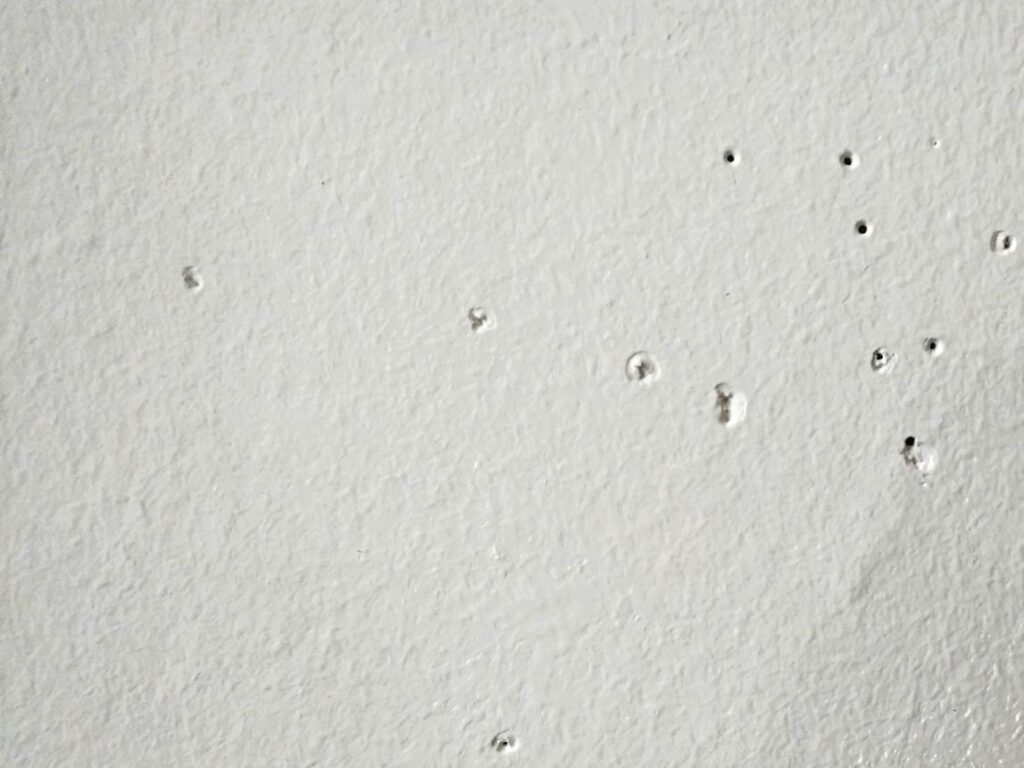
Small holes and dents
Usually suitable for lightweight filler or spackling compound.
Surface cracks
May require joint compound and reinforcing tape.
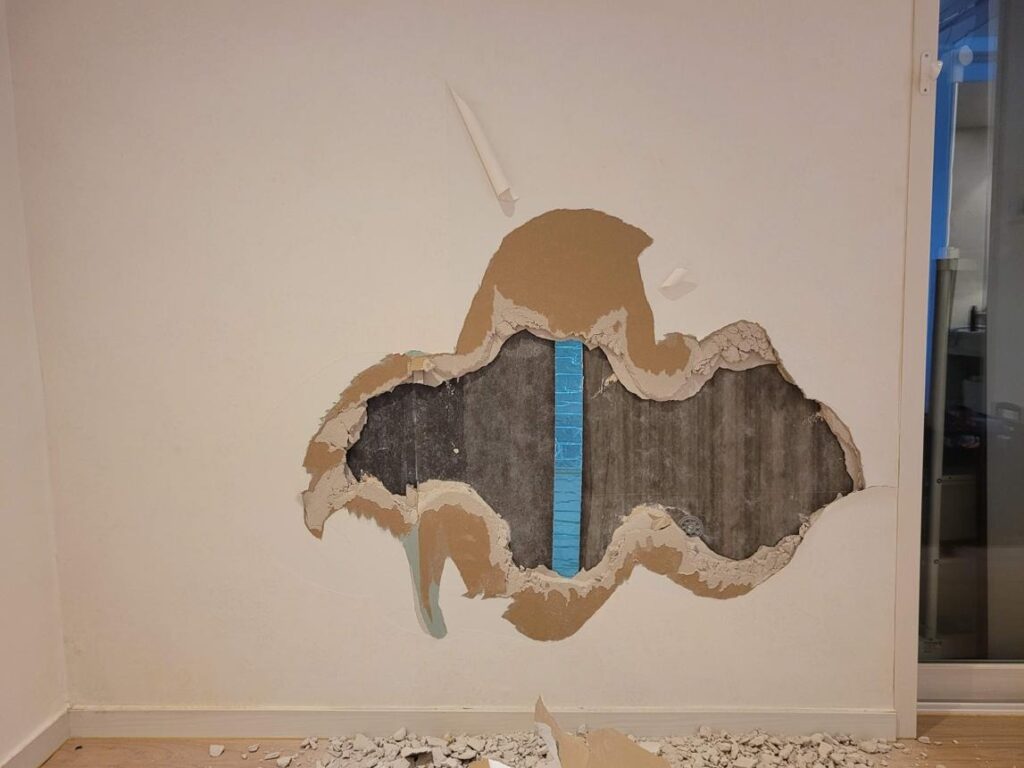
Large holes
Often need a properly supported drywall patch.
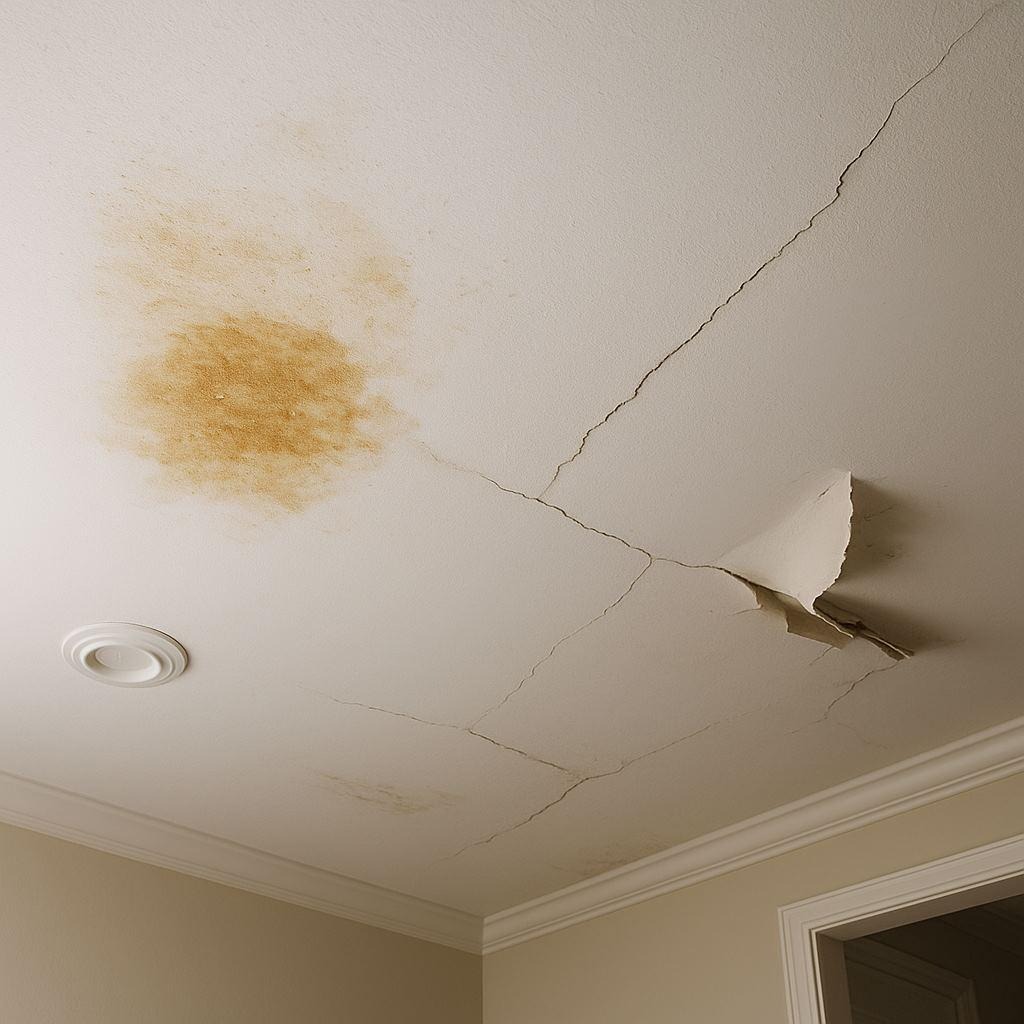
Moisture damage
Requires identifying and correcting the moisture source first.
If the wall feels soft, shows significant movement, or contains extensive mold contamination, a simple surface repair may not be sufficient.
Accurate assessment prevents homeowners from covering problems that require more substantial attention.
Most minor drywall repairs can be completed using widely available supplies.
The exact materials depend on the damage, but a basic repair kit may include:
- Joint compound or lightweight spackling paste.
- Drywall taping knives in different widths.
- Fine-grit sanding sponge or sanding block.
- Fiberglass mesh or paper joint tape.
- Replacement drywall for larger openings.
- Drywall screws and suitable backing supports.
- Utility knife and drywall saw.
- Primer and matching interior paint.
- Protective eyewear and dust protection.
Choose products according to the specific repair requirements.
Spackling products are convenient for small imperfections, while joint compound is generally better suited to larger patches and taped joints.
Before cutting into an older wall, consider the possibility of concealed electrical wiring, plumbing, or hazardous materials such as lead-based paint and asbestos-containing materials.
Small nail holes are among the easiest drywall defects to repair.
They often appear after removing picture frames, shelves, or decorative fixtures.
Begin by cleaning the surrounding surface and removing loose paint or drywall fragments.
Apply a small amount of lightweight spackling compound using a flexible putty knife.
Press the filler into the opening and scrape away excess material so the surface remains as level as possible.
Allow the compound to dry according to the manufacturer’s directions.
After drying, lightly sand the repaired area with fine-grit sandpaper.
Apply additional filler if shrinkage creates a shallow depression.
Finish with suitable primer and matching paint.
For small dents, the same process generally works well, provided the underlying drywall remains firm and stable.
This technique offers an inexpensive way to restore smooth interior walls without extensive preparation.
Hairline cracks commonly develop around doorways, windows, and drywall joints.
Some result from minor building movement or changes in temperature and humidity.
Others indicate poorly finished seams or insufficient reinforcement.
Start by examining the crack to determine whether it is stable.
For a small, nonmoving surface crack, remove loose material and apply a suitable repair compound.
Cracks located along drywall seams may require reinforcing tape to help prevent recurrence.
Paper joint tape embedded in joint compound is commonly used for seam repairs. Certain fiberglass products are also appropriate when installed according to their specifications.
Apply thin coats of joint compound, allowing each layer to dry before adding another.
Feather the edges outward to blend the repair into the surrounding wall.
If cracks repeatedly return, widen significantly, or appear alongside sticking doors and uneven floors, investigate possible building movement before performing additional cosmetic repairs.
Medium-sized holes may result from accidental impacts, removed electrical fixtures, or damaged wall accessories.
Depending on the opening’s dimensions and location, a manufactured drywall patch or a small piece of replacement drywall may provide a suitable repair.
Self-adhesive mesh patches can work for certain nonstructural openings within the manufacturer’s approved size limits.
Begin by trimming damaged edges and cleaning away loose material.
Position the patch over the hole, ensuring that it extends sufficiently onto sound surrounding drywall.
Apply an appropriate joint compound over the patch, gradually feathering the edges beyond the damaged area.
Several thin coats generally produce a better finish than one excessively thick layer.
Once dry, sand gently until the transition feels smooth.
Prime the repaired surface before painting to minimize visible differences in texture and paint absorption.
Large holes generally require more substantial repairs.
A replacement piece of drywall supported by framing or backing material is usually more reliable than attempting to bridge a large opening with filler alone.
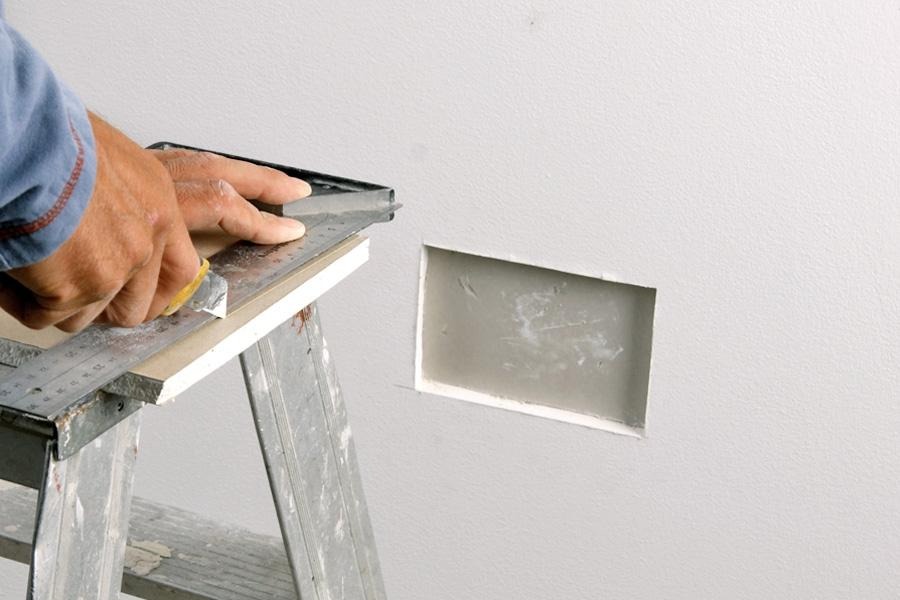
Step 1 — Prepare the opening
Cut away damaged drywall to create a clean, manageable opening. Check for concealed wiring and plumbing before cutting.
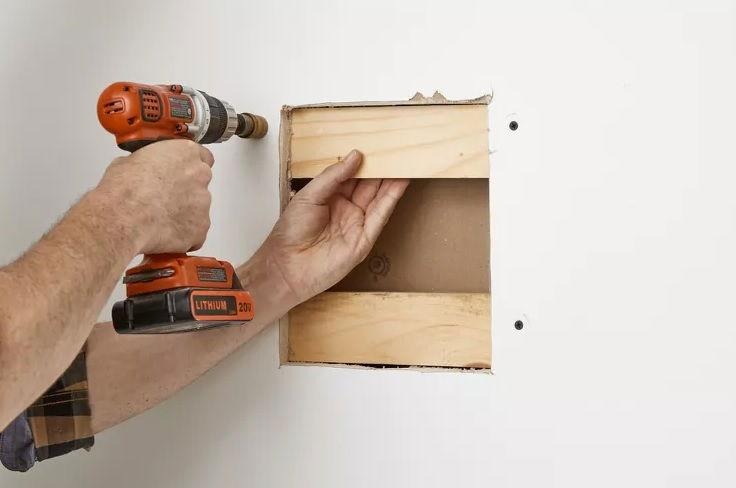
Step 2 — Install backing support
Secure suitable wood or other approved backing behind the opening where framing is unavailable.
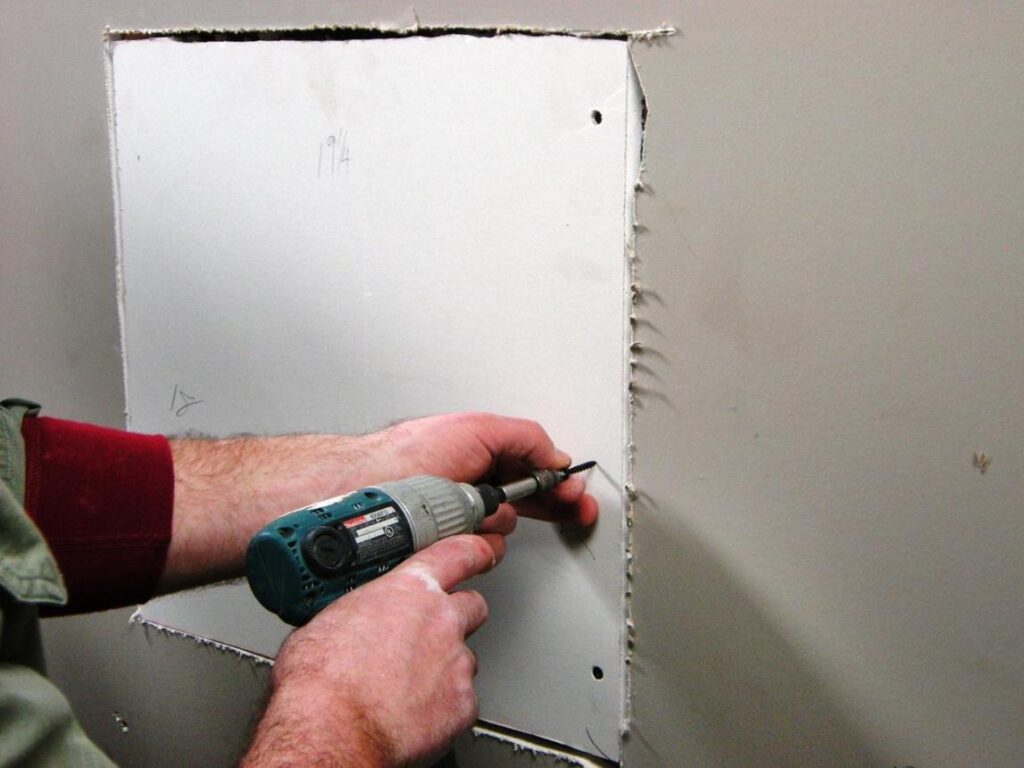
Step 3 — Attach replacement drywall
Cut a panel matching the existing drywall thickness and fasten it securely to the support.
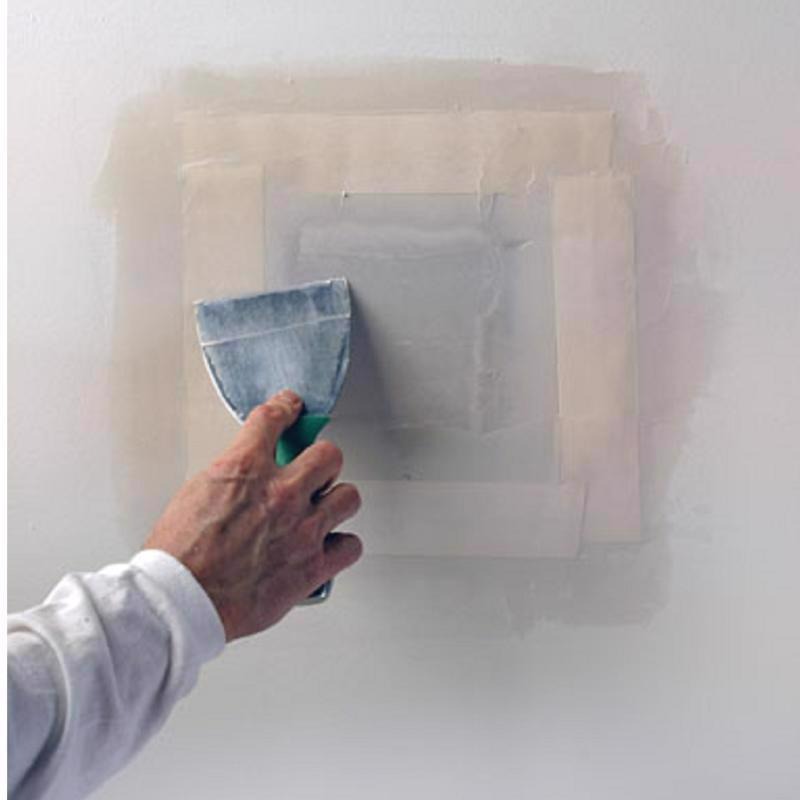
Step 4 — Tape and finish
Apply joint tape and compound, then build up thin finishing coats until the patch blends into the surrounding surface.
This method creates a supported repair rather than relying on joint compound to fill an unsupported opening.
For fire-rated walls or ceilings, the repair must preserve the assembly’s required fire-resistance performance.
Outside wall corners are especially vulnerable to impacts from furniture, vacuum cleaners, and everyday activity.
These corners often contain metal, vinyl, or paper-faced corner bead designed to protect the drywall edge.
When the corner bead becomes bent or loose, the surrounding joint compound may crack or break away.
For minor surface chips, remove loose material and apply a suitable compound.
If the corner bead is severely damaged, the affected section may need replacement.
Secure the new corner bead according to the manufacturer’s instructions and cover it with joint compound.
Use a taping knife to feather the finish onto both adjoining wall surfaces.
Allow each coat to dry before sanding and applying the next.
A properly repaired corner restores the room’s clean lines and helps protect the drywall against future impacts.
Water damage requires a different approach from ordinary holes or scratches.
Stains, bubbling paint, softened drywall, and musty odors may indicate moisture entering from leaking pipes, roofs, or nearby fixtures.
Before beginning repairs, identify and stop the water source.
Drywall that has lost structural integrity, developed significant mold growth, or remained contaminated by sewage or floodwater may require removal and replacement.
Do not simply apply joint compound over damp or deteriorating material.
For a small, previously stained area that is now completely dry, remains sound, and shows no mold, a suitable stain-blocking primer may help prepare the surface for repainting.
When damage affects insulation, framing, or concealed cavities, further investigation may be necessary.
Professional assistance is advisable for extensive water damage, suspected contamination, or persistent moisture.
One of the biggest challenges in drywall restoration is making the repaired area visually disappear.
Even when a patch is smooth, differences in wall texture can make the repair noticeable.
Common interior textures include orange peel, knockdown, smooth finish, and subtle roller patterns.
For smooth walls, feather joint compound gradually beyond the repaired area.
For textured walls, select a compatible texture product or application technique.
Practice the texture on scrap material before applying it to the finished repair.
Allow the surface to dry and inspect it under normal room lighting.
Texture matching often requires patience because small differences become more visible when light travels across the wall.
Drywall repairs can become noticeable or fail prematurely when basic finishing techniques are ignored.
| Common mistake | Why it causes problems | Better approach |
| Applying thick compound layers | Shrinkage and cracking | Use several thin coats |
| Skipping joint tape | Seams may reopen | Reinforce appropriate joints |
| Sanding aggressively | Damages drywall paper | Sand gently with suitable grit |
| Painting without primer | Uneven sheen and absorption | Prime repaired areas |
| Ignoring recurring cracks | Underlying movement remains | Investigate the cause |
| Patching damp drywall | Conceals moisture problems | Stop leaks and assess damage first |
Another common mistake is attempting to repair a large opening without adequate backing.
Joint compound is a finishing material, not a substitute for secure structural support.
Following a systematic process helps reduce repeated repairs and unnecessary material waste.
Proper painting is the final stage of drywall restoration.
Begin by removing sanding dust from the wall using an appropriate cleaning method.
Check the repaired surface under angled lighting to identify ridges, depressions, or sanding marks.
Apply a primer suitable for new joint compound and the existing wall finish.
Primer helps create consistent paint absorption and reduces the likelihood of dull patches appearing after painting.
Once the primer dries, apply matching interior paint using the recommended roller or brush.
Even with the original paint color, minor differences may remain because older paint changes with age and exposure.
Painting the entire wall from corner to corner often provides a more consistent finish than spot painting alone.
Although many drywall problems can be repaired locally, some conditions require more extensive work.
Full-panel or larger sectional replacement may be appropriate when drywall is extensively saturated, severely deteriorated, or affected by widespread damage.
Large areas of detached paper, repeated cracking caused by unstable framing, and widespread mold contamination may also justify removal.
The goal should not be to preserve damaged material at all costs.
Instead, homeowners should determine which repair method provides a safe, durable, and cost-effective result.
Small cosmetic problems usually justify localized repairs, while widespread deterioration may make replacement more practical.
Maintaining drywall is relatively straightforward when common causes of damage are addressed.
Use doorstops to prevent handles from striking adjacent walls.
Install wall anchors suited to the intended load rather than relying on drywall alone for heavy objects.
Control indoor humidity and repair plumbing leaks promptly.
Clean painted surfaces gently to avoid damaging finishes.
Inspect cracks and patched areas periodically, particularly after significant building movement or moisture problems.
Addressing small defects early can prevent more noticeable deterioration.
Drywall repair techniques provide practical ways to restore damaged interior walls without unnecessary full replacement.
Small holes can often be corrected with lightweight filler, while cracks require suitable reinforcement and careful finishing. Larger openings benefit from supported drywall patches, and damaged corners may need replacement corner bead.
Successful restoration depends on identifying the cause of damage, preparing surfaces correctly, applying appropriate materials, and blending repairs into the existing wall finish.
With proper techniques and attention to detail, homeowners can restore smooth, attractive interior walls while controlling renovation costs and extending the life of their drywall surfaces.
 Galileo