Acrylic nails are a fantastic way to achieve stunning, salon-quality manicures that last for weeks. However, when it’s time to remove them, the process can feel overwhelming, especially if you don’t want to visit a salon. Learning how to get my acrylic nails off at home can save you money, time, and even protect your natural nails from potential damage. This guide will walk you through the safest methods, tools you’ll need, and aftercare tips to keep your nails healthy and strong.
Improperly removing acrylic nails can lead to serious damage, including thinning, peeling, and even painful infections. Taking the time to remove them correctly ensures your natural nails remain strong and healthy.
While professional removal is convenient, it can also be costly. Mastering the art of at-home acrylic nail removal allows you to maintain your nails without the added expense of salon visits.
Many people make the mistake of peeling or prying off acrylics, which can cause irreparable harm to their nails. Proper removal methods help you avoid these pitfalls.
- Nail File or Buffer: To gently file down the top layer of the acrylic.
- Acetone (100% Pure): Essential for dissolving the acrylic material.
- Cotton Balls or Pads: For applying acetone directly to the nails.
- Aluminum Foil Strips: Used to wrap and secure acetone-soaked cotton on your nails.
- Cuticle Pusher or Orangewood Stick: To carefully lift and remove softened acrylic.
- Nail Clippers: For trimming down excess acrylic.
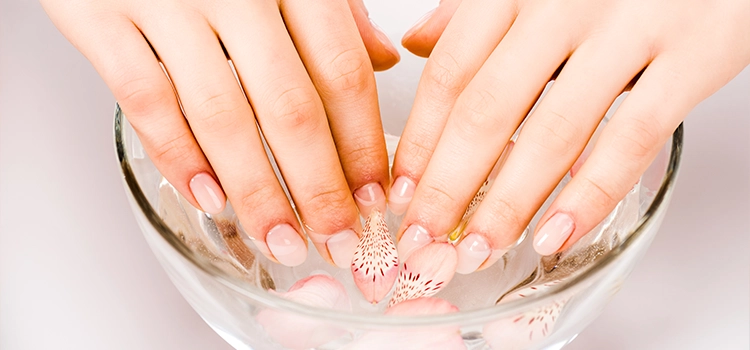
- Bowl (Optional): For soaking nails directly in acetone.
- Petroleum Jelly or Cuticle Oil: To protect the skin around your nails.
- Gloves: To protect your hands from acetone exposure, if desired.
- Well-Ventilated Space: Always work in a room with good airflow to avoid inhaling acetone fumes.
Start by removing any nail polish or topcoat. Use a coarse nail file to gently file down the shiny top layer of the acrylic nails. This helps the acetone penetrate more effectively. Apply petroleum jelly around the nail beds to protect your skin from drying out.
Fully saturate cotton balls or pads with 100% pure acetone. This is essential for breaking down the acrylic material.
Place the acetone-soaked cotton on each nail and secure it with aluminum foil strips. Make sure the foil is tight enough to hold the cotton in place but not so tight that it restricts blood flow.
Allow the acetone to work its magic by breaking down the acrylic. Use a timer to track the soaking period. During this time, you can relax, read a book, or watch your favorite show.
After soaking, gently remove the foil and cotton balls. Test one nail first to check if the acrylic has softened. If it hasn’t, rewrap and soak for another 10 minutes.
Using a cuticle pusher or orangewood stick, carefully push off the softened acrylic. Avoid using excessive force to prevent damaging your natural nails. If some acrylic remains, repeat the soaking process.
Once all the acrylic is removed, use a nail buffer to smooth out any rough surfaces. This step ensures your natural nails look clean and polished.
If you don’t have acetone, a warm water and soap soak can help loosen the acrylic. While this method is gentler, it’s less effective and may take more time.
Pre-packaged kits designed specifically for acrylic nail removal can simplify the process. These kits often include all the necessary tools and instructions.
For experienced users, an electric nail drill can speed up the removal process. However, improper use can lead to damage, so proceed with caution.
If home methods fail or your nails are severely damaged, it’s best to visit a professional for safe removal.
- Avoid Peeling or Pulling: Never try to forcefully remove acrylics, as this can strip layers off your natural nails.
- Use Pure Acetone: Regular nail polish remover is not strong enough to dissolve acrylics effectively.
- Be Patient: If the acrylic doesn’t come off easily, re-soak and try again rather than rushing the process.
- Moisturize After Removal: Hydrate your nails and cuticles immediately to minimize dryness.
Apply cuticle oil, vitamin E, or a hydrating hand cream to keep your nails and surrounding skin moisturized.
Use a nail hardener or biotin supplements to improve nail strength and prevent breakage.
Avoid applying nail polish or enhancements for at least a week to allow your nails time to recover.
Incorporate foods rich in vitamins and minerals, such as eggs, nuts, and leafy greens, to promote overall nail health.
- Skipping the Soaking Process: Soaking is crucial for softening acrylics.
- Using Metal Tools Aggressively: Metal tools can damage your natural nails if used improperly.
- Neglecting Aftercare: Failing to care for your nails post-removal can lead to long-term damage.
Yes, but alternative methods like warm water soaks are less effective and take longer.
The process typically takes 30-60 minutes, depending on the method used and the condition of your nails.
Yes, but take extra care to avoid causing further damage to your natural nails.
Experts recommend taking a break every 2-3 months to allow your natural nails to recover.
If your nails feel sore, apply a cold compress and avoid using nail polish or enhancements until they heal.
Now that you know how to get my acrylic nails off at house safely and effectively, you can confidently take care of your nails without rushing to the salon. Remember, patience and proper technique are key to protecting your natural nails during the removal process. By following these steps and prioritizing aftercare, you’ll keep your nails healthy and looking great.